I have done menu planning for years. I have done simple plans by just writing out my menu for the week...index cards, dry erase board, or even on a list. I have created rotating menu plans using an index card system to a more formatted one created on Microsoft Word. Menus have been done for breakfast, lunch, snacks and dinners. Weekly, bi-monthly and even a four/five week meal rotation plan have been created.
Well, in this season of life, with so many "unexpected's", I am now moving on to give the menu board a try. I found this idea on Pintrest {where else!} and loved it! {Oh, just a quick invite...I'd love for you to join me on Pintrest. Visit my sidebar and follow along. You'll find all my favorite finds on my boards, added to regularly...so join now to gather some ideas that may work for you.}
Okay, back to the idea I found there...
 |
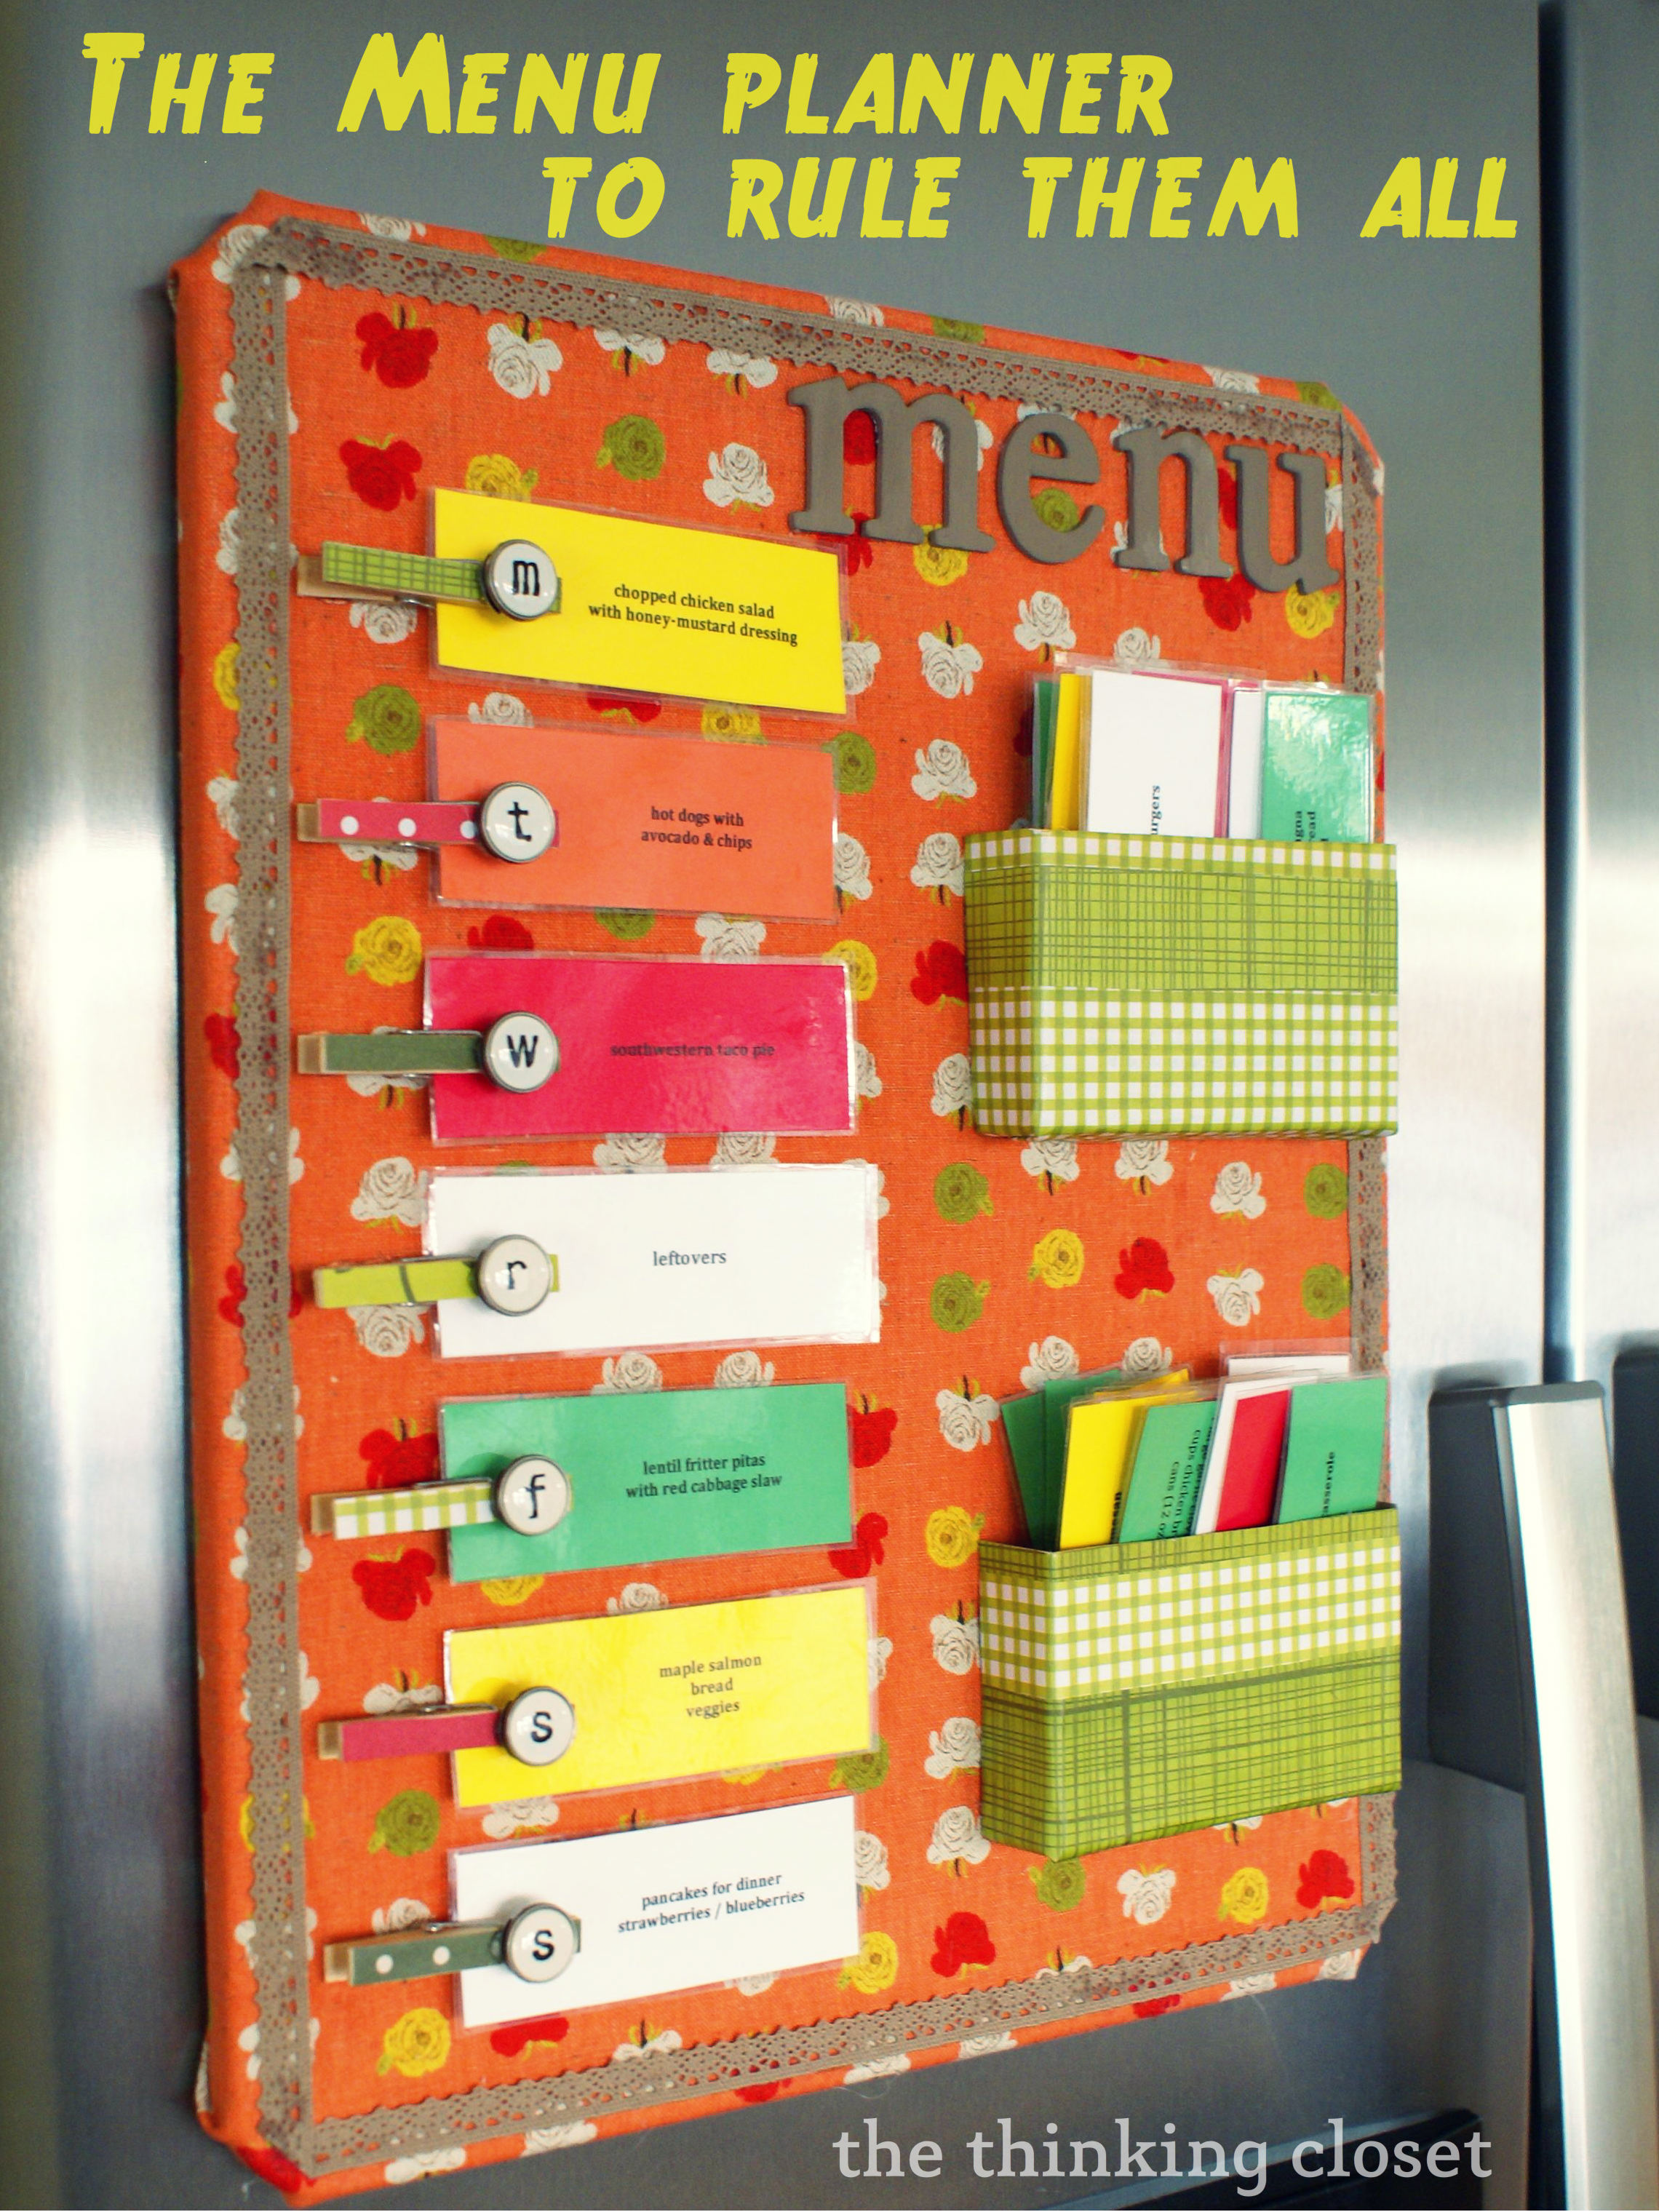
| Lauren, at the thinking closet, created hers based on the idea she found at Once Upon a Chocolate Chip Pancake. |
Clair's idea, from Once Upon a Chocolate Chip Pancake, utilized a photo frame which provides a wall mountable version. I'd say this one would be fairly quick to put together. Clair did a post showing several ideas she found which prompted her to create her own, as shown below.
 |
| Be sure to visit Clair here to read more about her menu board finds and how she put the one above together. |
However, I didn't have an 11"x14" frame on hand nor the kitchen wall space to mount it to. So, between the two examples, I made a few adaptations and this is what I came up with to fit our family, my style and using the supplies I had on hand.
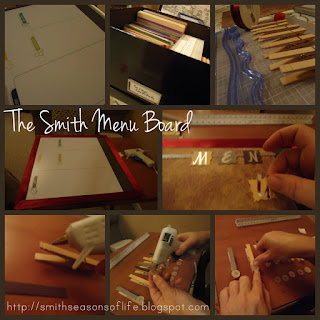
I took our existing magnetic dry erase board measuring around 14"x14", 7 clothespins, two Curad bandaide boxes, ribbon, scrapbooking paper, stickers, 7 buttons, a hot glue gun, double sided tape and business card self-adhesive magnets to compile the Smith Menu Board above. It took about an hour and 1/2, if you include the time to think it through.
The photo collage above shows:
- some of the supplies I used one the first row,
- the ribbon applied to the perimeter and the papers and stickers added on the second row,
- and the strips of card stock hot glued to the clothespins, then buttons hot glued to the ends afterward on the last row
I have not made my menu cards yet, figuring that will take the most time. I plan to use Clair's idea of making 5 cards per page {two columns, five rows}, fold them in half and laminate. I will probably use different colors for different food themes when I print them out, as did Claire and Lauren. I will do mine using Microsoft Word, by creating a table {I prefer tables...it's what I am most proficient at using quickly}. I plan to take my existing five week menu rotation, found here, and type out the cards. That should provide about 30 recipes to choose from. I am sure I'll add more, since I have added some good recipes to my recipe book recently.
There you have it! A simple, yet decorative Menu Board put together in less than 2 hours. I really love how it turned out and can't wait to add my menu cards and start using it! I would love to see one you have made or maybe this will inspire you to make one.
Happy Menu Planning and Happy New Year!
Blessings ~
Joyfully joining this week at:
- Teach Me Tuesday
- Domestically Divine Tuesday
- Welcome Home at Raising Arrows
- Better Mom Monday
- Hearts 4 Home


5 comments:
That looks so cooool :) glad to have found you via Teach Me Tuesday's link up. Tara.
Dear Jarnette,
Thank you very much. I love the idea.
I do have supplies on hand to make a Family Menu Board and I am excited to create one. I love how you explained everything in easy to follow steps.
Your Menu Board turned out great.
Have a Happy, Healthy and Blessed New Year my dear friend.
Love,
Virginia
Tara ~
Thanks for visiting me...nice to meet you. :D I will try to do an update post when my menu cards are done and maybe post some of the printables to get ladies started.
VA ~
It made it really easy using what I had on hand, saving money that way! I can't wait to see the one your make. Do come back and post. Happy New Year my friend!
Love ~
Jarnette
Nicely done. I am boring. I received a Betty Crocker 2013 calendar and that is where I write down what we are having for dinner.
Stephanie,
www.year-roundgiving.com
Stephanie ~
Thanks for sharing...any system is great, as long as it works for the person! Calendars serve two purposes then...keeping track of the days & in this case the MEALS. ;D Nicely themed, too...I have made some good Betty Crocker recipes and the was the first cookbook my mom ever gave me.
Blessings ~
Jarnette
Post a Comment